Unofficial Medium API: Get Posts Using Python
User-written articles, publication articles, and top feeds

Hey guys!
Welcome back to another tutorial for Unofficial Medium API. Today I will teach you how you can get posts from Medium using Python programming language.
By the end of this article, you will be able to extract any user-written articles, any stories published by a publication, and posts published with certain tags.
You can use any programming language of your choice here since we're using a REST API. But here, I'll focus on Python only since we have an SDK ready, which will make our life easier.
If you're coding in any other language, such as Javascript, PHP, C/C++, or something like that, please look into this swagger documentation.
For all the python programmers, sit tight, and let's jump to the code.
Getting posts using Medium API
To simplify the usage of Medium API, we'll install medium-api python package.
First of all, open up your favorite IDE and fire up the terminal.
Type "pip install medium-api" and hit enter.
pip install medium-api
This will install medium-api package in your python environment, so you can import it in your project.
Get User's Posts
Now, create a new python file and name it, "get_user_articles.py"
Import the Medium class object from medium_api module. And initialize it using your API_KEY.
💡 Note: To get your API_KEY, Subscribe to our Unofficial Medium API. And don't worry, you can start by choosing the FREE plan.
Now, create a Medium User Object by passing your username (here nishu-jain). Then call fetch_articles() function, will quickly extract articles information using multi-threading.
At last, you can loop through user articles objects and print its title.
That's it!
Get Publication's Posts
Now let's create another file called "get_publication_articles.py".
Start by importing the Medium object and initializing it using your "API_KEY".
💡 Note: To get your API_KEY, Subscribe to our Unofficial Medium API. And don't worry, you can start by choosing the FREE plan.
Define a Publication object by passing the publication_id. Here, I'm using a publication called "Towards AI" as an example.
How to get the publication_id?
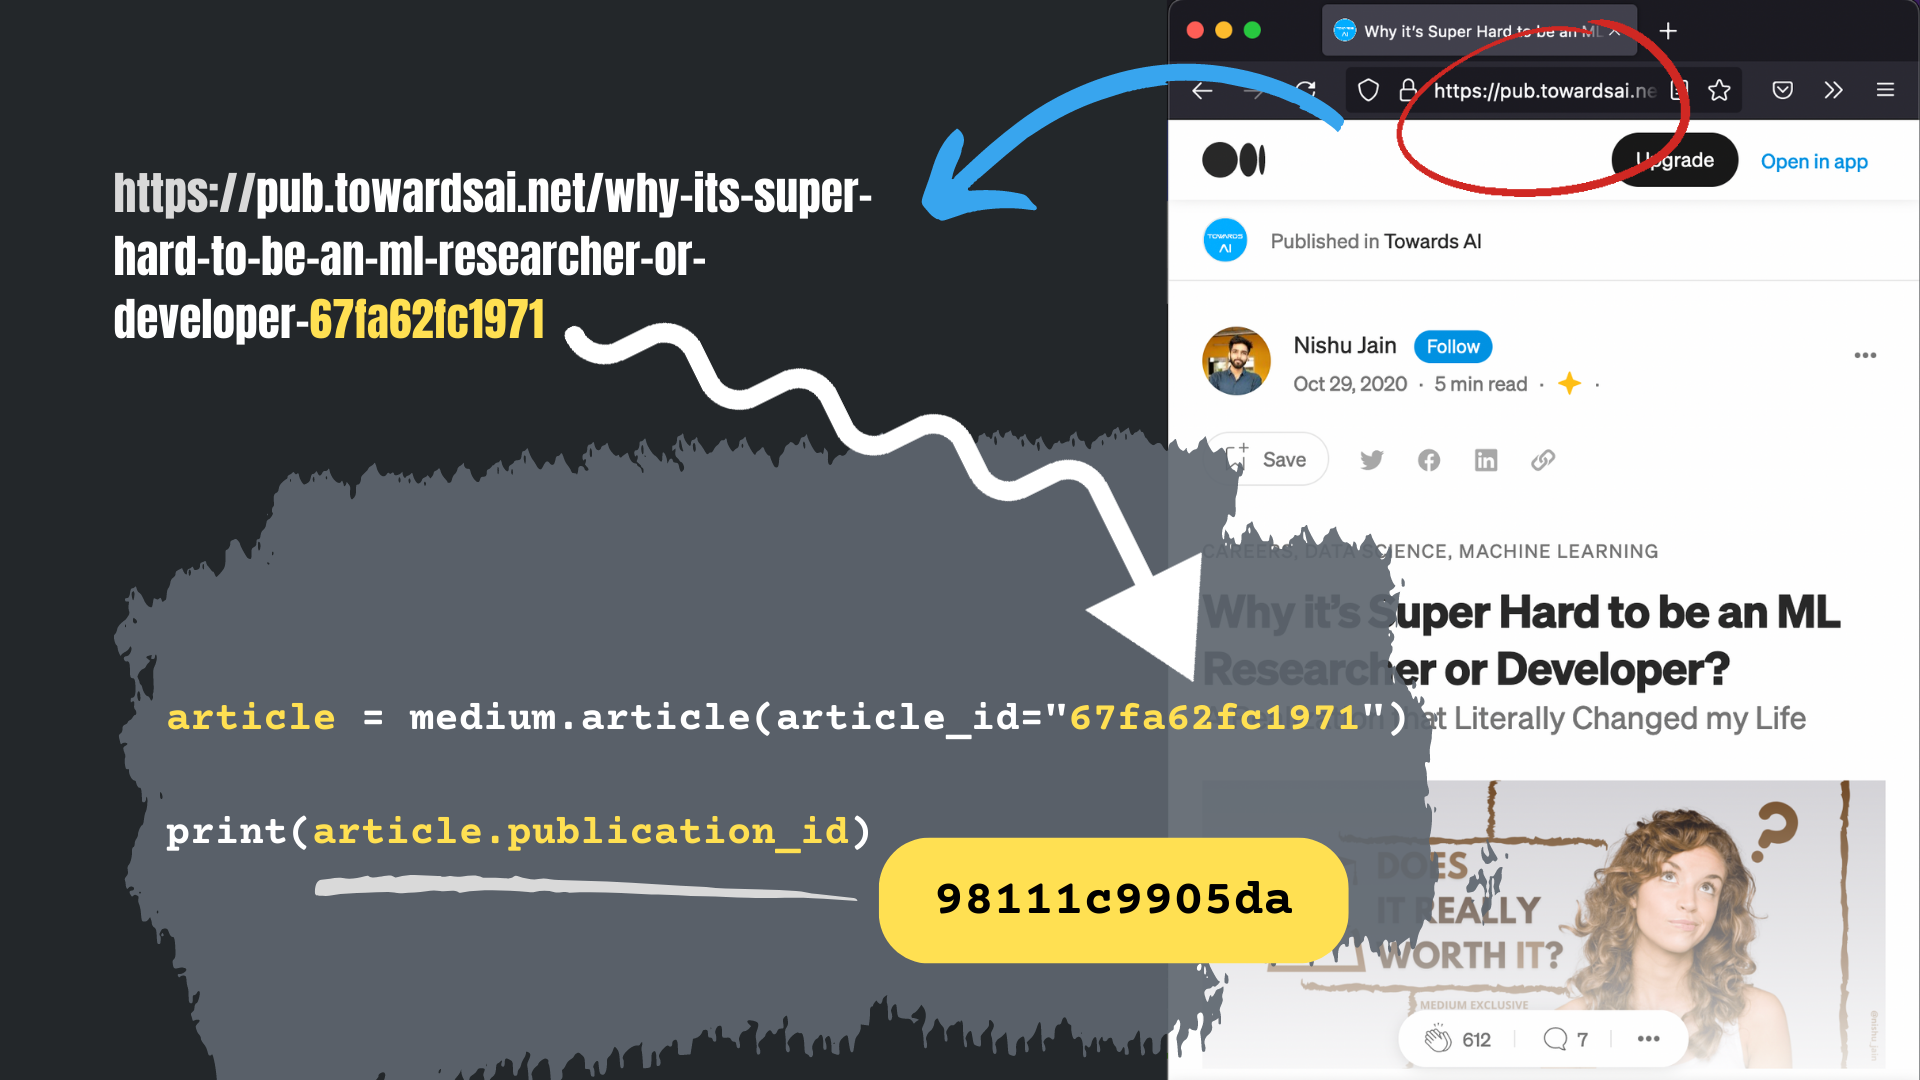
To get the publication ID, one of the easiest method would be to get it from an
Articlesobject.1. Open up any article published under that publication, and copy its URL.
2. Take the hash at the end of the URL, and create an Articles object using it.
3. Print article dot publication ID and save it somewhere else, so it can be re-used.

Now, using the get_articles_between() function, of the publication object, get all the articles published in the last week. To do so, you'll have to pass two date-time parameters, _from, and, _to.
At last, iterate through the list of last week's article objects and print their title and published dates.
Get Top feed Articles
Now let's create another file called "get_topfeeds.py".
As usual, start by importing the Medium Object, and initialize it using the API_KEY.
💡 Note: To get your API_KEY, Subscribe to our Unofficial Medium API. And don't worry, you can start by choosing the FREE plan.
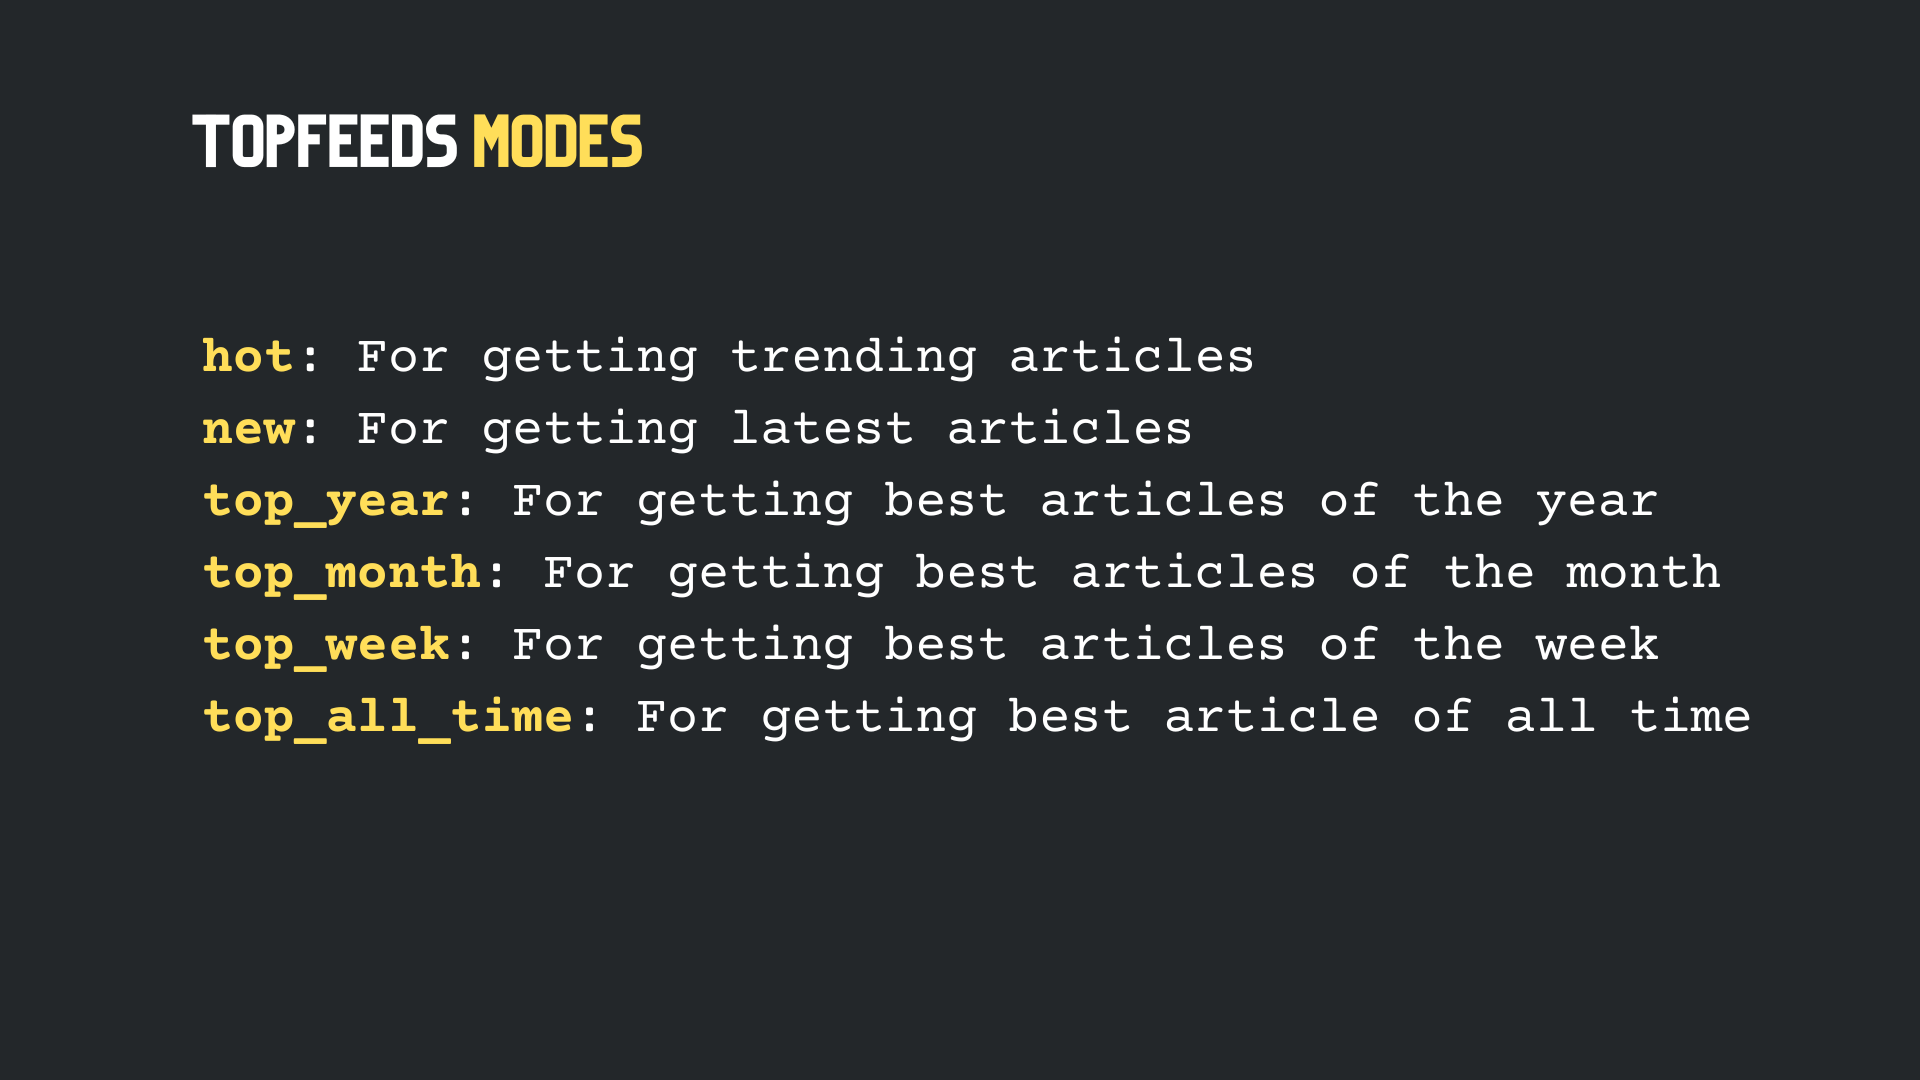
Define a TopFeeds object by passing the tag and mode.
Here we can take blockchain as the example tag and mode "new", to fetch the latest blockchain articles.

Now, call the fetch_articles() function to quickly get posts using multi-threading.
At last, loop through the top feeds articles and print their title.
Final thoughts -
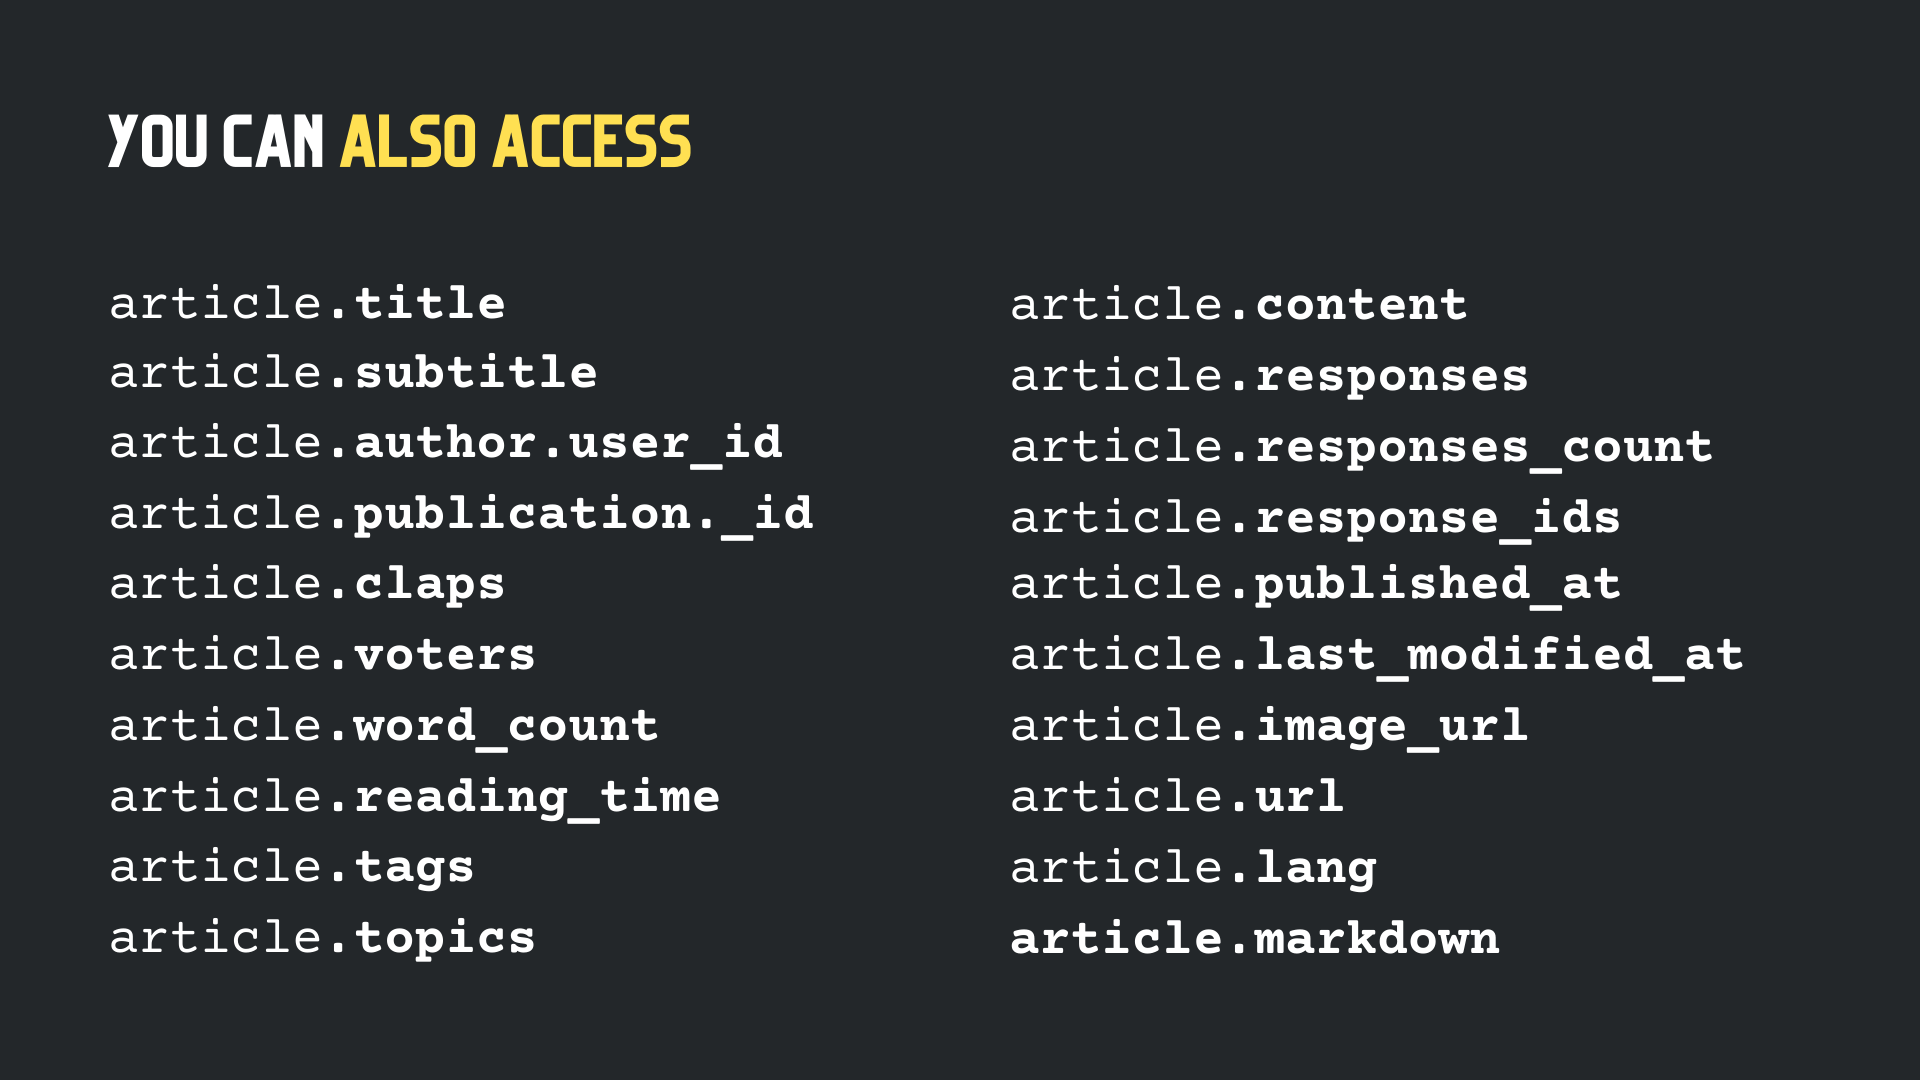
Once you get the Articles object, you can access several of its properties, like its - title, subtitle, author's details, publication details, claps, voters, word count, reading time, tags, topics, textual content, responses, responses count, published date, last modified date, cover image URL, language, article URL, and also, you can get the entire article in the markdown format.

Important Resources 💡
- Homepage: https://mediumapi.com
- GitHub: https://github.com/weeping-angel/medium-api
- ReadTheDocs: https://medium-api.rtfd.io
- Swagger Documentation: https://docs.mediumapi.com
- RapidAPI: http://hub.mediumapi.com
PS: We post tutorials, videos, code snippets, and insights related to Medium and Unofficial Medium API. So be sure to follow us on
- Twitter: twitter.com/medium_api
- LinkedIn: www.linkedin.com/company/medium-api
🔗 Related Articles -